Introduction: Why Build Your Own PC?
Building your own PC offers numerous advantages over buying a pre-built system. You'll get complete control over component selection, potentially save money, gain valuable technical knowledge, and experience the satisfaction of creating something with your own hands. This comprehensive guide will walk you through every step of the process, from planning to powering on your new custom PC for the first time.
Part 1: Planning Your Build
Determining Your Needs and Budget
Before purchasing any components, it's essential to determine what you'll be using your PC for and how much you're willing to spend. Gaming PCs have different requirements than workstations for content creation or office work. Set a realistic budget and allocate funds based on your priorities. Generally, the graphics card and processor should receive the largest portion of your budget for gaming builds, while content creation might prioritize CPU power and RAM.
Ensuring Component Compatibility
One of the most challenging aspects of PC building for beginners is ensuring all components work together. Here are the key compatibility factors to consider:
- CPU and Motherboard: Check socket type (e.g., AM5 for AMD, LGA1700 for Intel) and chipset compatibility.
- RAM and Motherboard: Verify supported RAM type (DDR4 vs DDR5), speed, and maximum capacity.
- Case and Motherboard: Ensure your case supports your motherboard form factor (ATX, Micro-ATX, Mini-ITX).
- Power Supply: Calculate your system's power requirements and add 20-30% overhead for future upgrades.
- Storage: Check that your motherboard has sufficient storage connections (M.2 slots, SATA ports).
Tools like PCPartPicker can help verify compatibility between components and estimate total power consumption.
Part 2: Essential Components
CPU (Central Processing Unit)
The CPU is your computer's brain. For gaming in 2024, the AMD Ryzen 7 7800X3D and Intel Core i5-14600K are excellent mid-range options, while the Ryzen 5 7600 and Core i3-14100F offer great value for budget builds. Consider the number of cores/threads, clock speed, and cache size based on your intended use.
Motherboard
Your motherboard connects all components and determines expansion capabilities. Key features to consider include chipset, form factor, number of RAM slots, expansion slots (PCIe), storage connections, and USB connectivity. B650 and B760 motherboards offer a good balance of features and price for mid-range builds.
RAM (Memory)
In 2024, 16GB is the minimum recommendation for gaming PCs, while 32GB is ideal for content creation or future-proofing. Consider both capacity and speed (MHz). DDR5 is the latest standard but comes at a premium price compared to DDR4.
Storage
A combination of storage types offers the best experience: an NVMe SSD (500GB-1TB) for your operating system and frequently used programs, and a larger SATA SSD or HDD for mass storage. PCIe 4.0 NVMe drives offer the best performance but at a higher cost than PCIe 3.0 alternatives.
Graphics Card (GPU)
For gaming, the GPU is often the most expensive component. The RTX 4060, RX 7600, or Intel Arc A580 are solid entry-level options for 1080p gaming. Mid-range options include the RTX 4070 and RX 7800 XT for 1440p gaming. Consider both performance in your favorite games and features like ray tracing and upscaling technologies.
Power Supply (PSU)
Never compromise on your power supply quality. Look for 80+ certification (Bronze, Gold, or Platinum) indicating efficiency. For most mid-range builds, a 650-750W PSU is sufficient, while high-end systems may require 850W or more. Modular PSUs offer better cable management but cost more than non-modular alternatives.
Case
Beyond aesthetics, cases differ in cooling potential, component clearance, and cable management features. Ensure adequate airflow with front mesh panels and sufficient fan mounts. Check clearances for CPU coolers, GPUs, and PSUs based on your selected components.
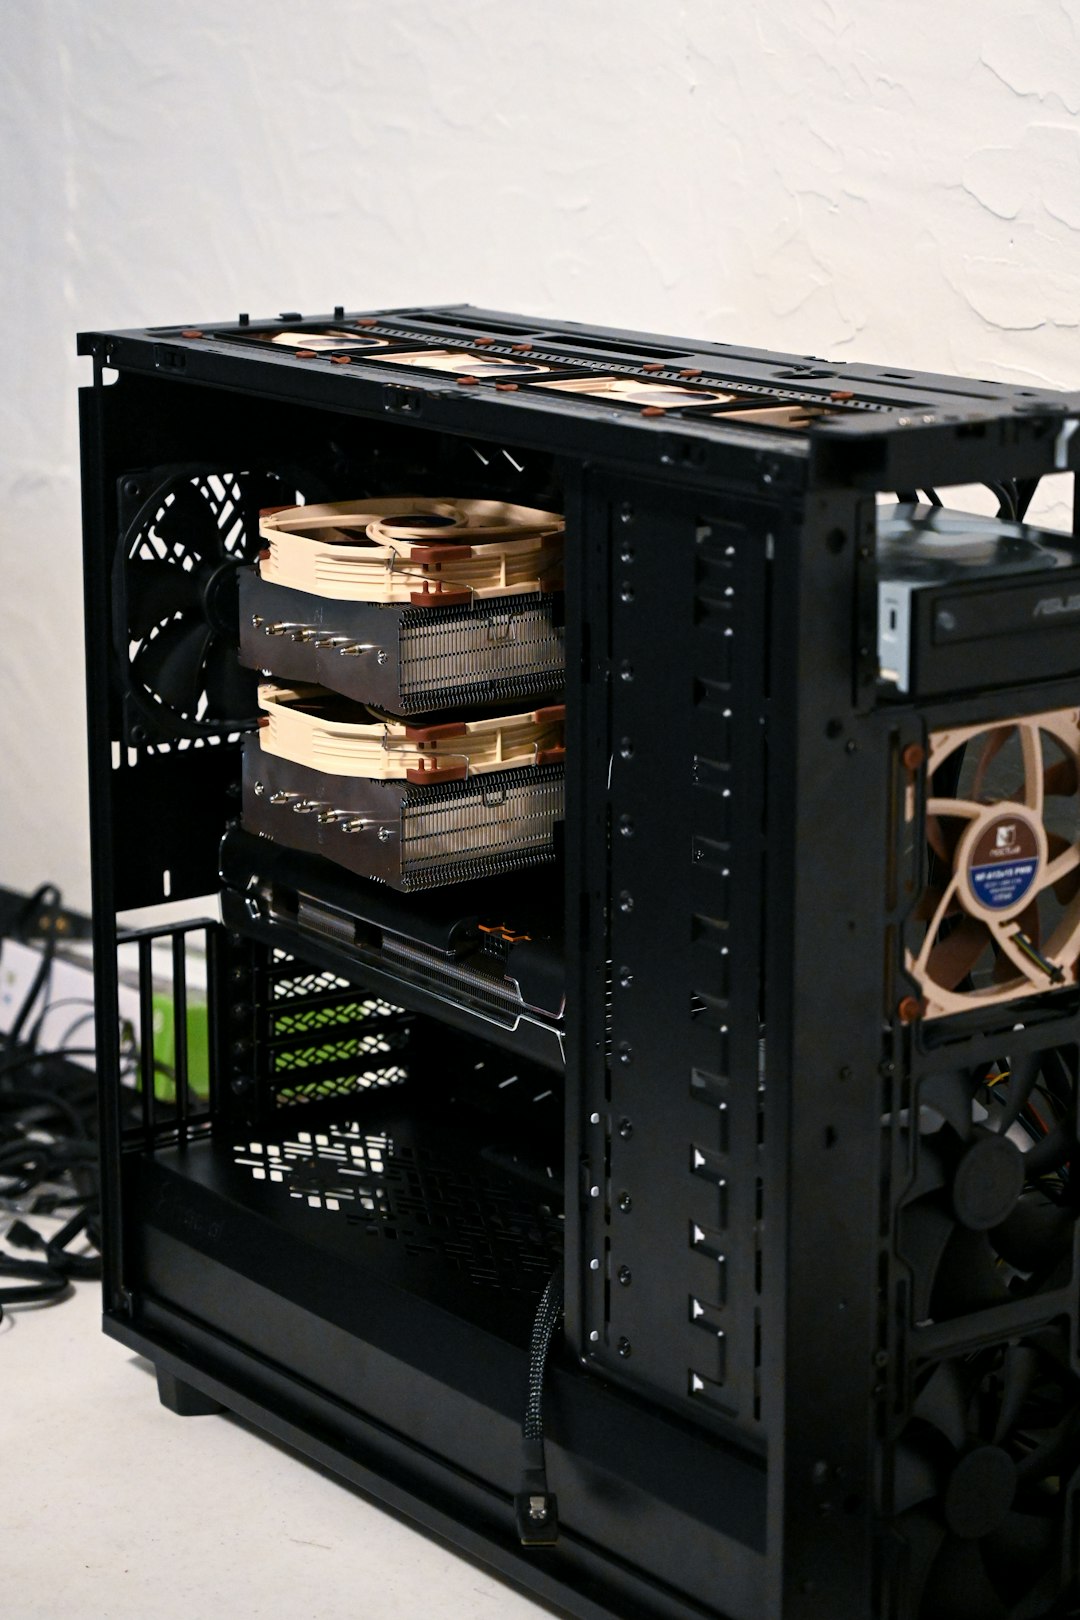
CPU Cooler
Stock coolers included with some CPUs are adequate for basic use, but aftermarket air or liquid coolers provide better thermal performance and lower noise. Air coolers like the Noctua NH-D15 offer excellent value, while AIOs (All-In-One liquid coolers) provide better aesthetics and cooling for high-end CPUs.
Part 3: Tools and Preparation
You'll need a few basic tools for assembly:
- Phillips-head screwdriver (#1 and #2)
- Anti-static wrist strap (recommended)
- Thermal paste (if not included with CPU cooler)
- Cable ties for management
- Flashlight or good lighting
- Clean, spacious work area
Before starting, unbox all components in a static-free environment and verify everything is present and undamaged. Read through your motherboard and case manuals, as they contain specific information for your hardware.
Part 4: Step-by-Step Assembly Guide
Step 1: Prepare the Case
Remove side panels, front panel if necessary, and identify all mounting points. Install standoffs in the correct positions for your motherboard form factor if they're not pre-installed. Mount case fans in optimal positions (typically intake at front/bottom, exhaust at rear/top).
Step 2: Install the Power Supply
Mount the PSU in its designated location, typically at the bottom rear of the case. Orient the fan facing down if your case has a bottom vent, otherwise face it up. Secure with provided screws but leave cables disconnected for now.
Step 3: CPU Installation
This is the most delicate part of the build. Place the motherboard on its box for a stable surface. Open the CPU socket, align the processor according to the marked corner (triangle on AMD, notches on Intel), and gently lower it into place without forcing it. Close the retention mechanism carefully.
Step 4: Apply Thermal Paste and Mount CPU Cooler
Apply a pea-sized dot of thermal paste to the center of the CPU if not pre-applied on your cooler. Follow your specific cooler's mounting instructions, as these vary widely between models. Ensure even pressure during installation and connect the cooler's fan to the CPU_FAN header on the motherboard.
Step 5: Install RAM
Identify the correct RAM slots from your motherboard manual (typically slots 2 and 4 for dual-channel with two sticks). Align the notch, open the retention clips, and press down firmly until the RAM clicks into place and the clips snap closed.
Step 6: Mount the Motherboard
Install the I/O shield into the case first if it's not integrated with the motherboard. Carefully lower the motherboard onto the standoffs, aligning the I/O ports with the shield. Secure with screws, starting with center screws and working outward. Don't overtighten.
Step 7: Install Storage Drives
Mount M.2 SSDs directly to the motherboard in their designated slots, securing with the provided screws. For 2.5" SSDs and 3.5" HDDs, install them in their respective drive cages or mounting points within the case.
Step 8: Install the Graphics Card
Remove the appropriate PCIe slot covers from the case. Align the GPU with the primary PCIe x16 slot (usually the top one), press down firmly until it clicks, and secure it to the case with screws. For heavy GPUs, consider support brackets to prevent sagging.
Step 9: Connect All Cables
This step requires patience and attention to detail. Connect cables in this order:
- 24-pin ATX power to motherboard
- 8-pin CPU power (sometimes labeled EPS)
- PCIe power cables to graphics card
- SATA data cables from drives to motherboard
- SATA power from PSU to drives
- Front panel connectors (USB, audio, buttons) according to motherboard manual
- Fan connectors to appropriate headers
Step 10: Cable Management
Route cables behind the motherboard tray using the case's management features. Group similar cables together and secure with ties. Good cable management improves airflow, aesthetics, and makes future modifications easier.
Part 5: First Boot and Setup
Before closing the case, perform a test boot to ensure all components are working:
- Connect monitor to GPU (not motherboard), keyboard, and mouse
- Double-check all power connections
- Turn on power supply switch and press the power button
- Enter BIOS by pressing the designated key during startup (typically Del, F2, or F12)
- Verify that RAM is running at its rated speed (enable XMP/DOCP if not)
- Check that all storage drives are detected
- Set boot order for OS installation
If everything works, shut down, close up the case, and proceed with operating system installation from a USB drive prepared beforehand.
Common Mistakes to Avoid
- Forgetting standoffs: This can cause motherboard shorts and permanent damage
- Poor thermal paste application: Too much or too little affects cooling efficiency
- Improper RAM installation: Not fully inserting RAM is a common cause of boot failures
- CPU alignment errors: Forcing a misaligned CPU can bend pins and destroy the processor
- Connecting to motherboard video outputs: When using a discrete GPU, connect your monitor to the GPU ports
- Neglecting cable management: Poor airflow from tangled cables can lead to thermal issues
- Not enabling XMP/DOCP: RAM will run at base speeds without this BIOS setting enabled
Conclusion
Building your first PC might seem daunting, but by following this guide and taking your time, you'll create a custom system tailored to your exact needs. The knowledge and experience gained will serve you well for future upgrades and builds. Remember that patience is key—rushing can lead to mistakes. If you encounter issues, consult component manuals or seek help from online communities dedicated to PC building.